Characters
This page, you can reach from the VTS topbar, allows you to create and configure new characters, which you can use in your scenarios. Those can be added to your scenes, talk or even react to your learner choices.
What is a character?
A character is made up of four main elements, which are described is the following subsections.
The 3D representation: the avatar
A character is mainly defined by its visual 3D representation. This is the physical representation of this character in the scenes of your scenarios. The 3D representation of a character is called the Avatar. The avatar choice will be detailed below in this section.
Name
The name of the character is useful for the writer only. It's simply a label to recognize this character among the others when you edit your scenarios and scenes.
The name is not displayed anywhere inside VTS Player.
Language
The character's language defines the language in which the texts spoken by this character will be written. By default, it is set to the context's main language, but you can change it to any other language. Therefore, several characters can speak different languages in the same project.
Voice
If a character speaks, you need to define their voice. The voice defines how the texts related to this character will be pronounced.
Two kinds of voice are available:
- Synthetic voices - automatically generated by VTS Editor (see the Synthetic voices section in the Text manager).
- Studio voices - recorded by a voice actor, then imported into your project.
The list of available synthetic voices depends on the character's language, as a synthetic voice only works for a given language.
When you select a voice, you can listen a short sample sound with the preview button on the left. Each voice has a name, however this doesn't affect this name doesn't affect the project.
Edition
Clicking on the Edit button at the bottom right, or on the character thumbnail on the left, opens the edit menu.
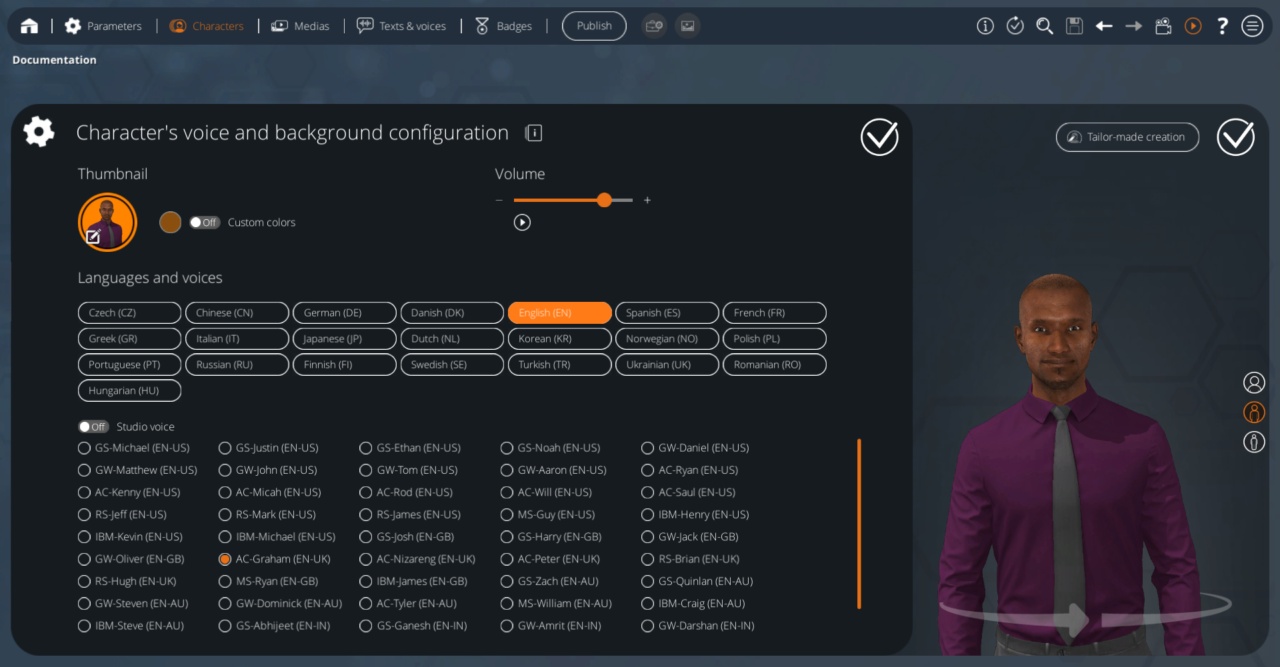
In this view you have access to more properties of your character. The language and voices are also available here.
Thumbnail and Colour
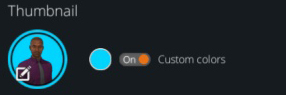
By clicking on the thumbnail, you can customise your characters with media to change its visual in the subtitles and conversation history in the experience.
Volume
You can independently manage the voice volume of this character with the slider on the right. This allows you to adjust the voices of your characters if you find that they are speaking too loudly or too softly. Mostly useful for studio voices, this also potentially allows you to better define the character's personality (e.g. a shy character will tend to speak lower than an aggressive person).
The Learner character
The first time you open the Casting screen, you will notice the presence of a first character: the learner's character. This is a very special character. It cannot be physically placed in the scenes, and do not have any avatar (3D representation).
Instead, they are implicitly present in every scene: the user of your experience sees the scene through their eyes.
You cannot rename or delete this character. You can only choose its language and voice.
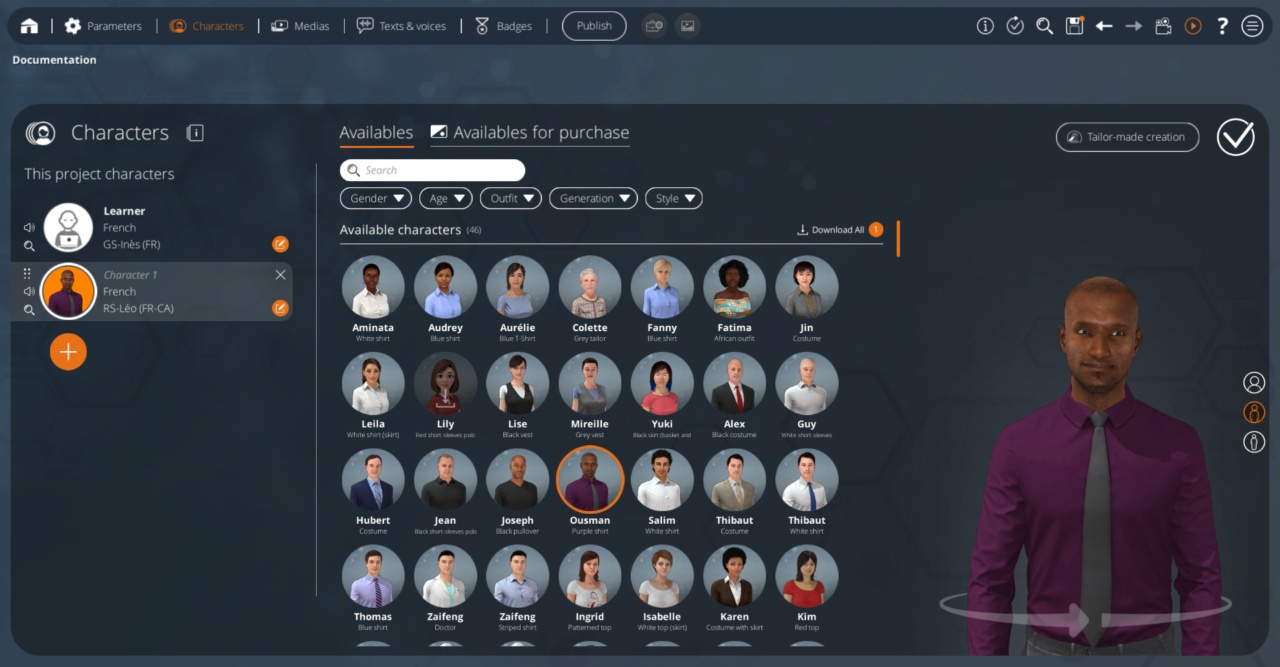
Add a new character
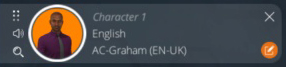
You are free to create more characters for your scenarios by clicking on the [+] button. By default, each character you create is configured with the project's main language, a random avatar and a random voice. Once created, new characters do not automatically come with a name. By default, they will be labeled as "Character 1", "Character 2", etc. depending on their rank in the characters' list.
Avatar choice
The selected character is highlighted in the left list. You can set its character with the avatar choice list displayed in the center of the page.
In this list, you can navigate through all the avatars and select the one for your character. The list is separated in two groups, representing the available character types, as shown by the tabs on the top of this view. Click on one of those will make you navigate through these groups.
You can find the list of different available avatars on this page.
Availables
VTS Editor offers many different types of avatars - simply select the desired one to set it up to your character.
Owned characters
![]()
If you have bought online an avatar or if one was assigned to you, it will appear in this list. They must be downloaded before use. You just have to click on those characters and VTS Editor will download all the needed files.
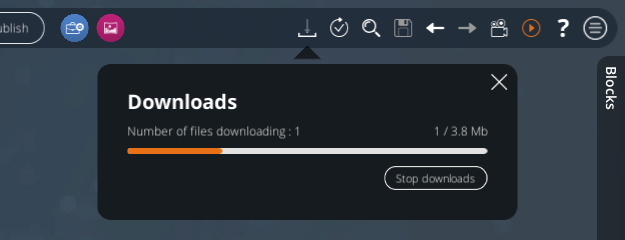
A download icon appears in the VTS top bar. Clicking on it will open a window which summarize all current downloads and allows to stop them.
![]()
You can download all your owned avatars at once by clicking on the Download All button displayed on the group title.
Update and Uninstall
Some avatars will have an orange update icon in the top right corner. This means that an update is available for that avatar. This update may be a visual fix, but never a major change to that avatar. Hair or clothing colour will not be changed by an update. Clicking on the orange visual opens the contextual menu of this element. This menu is accessible even for items that do not require an update.
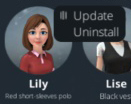
This menu offers two buttons:
Update: This button allows you to download the latest version available.
[note Text="An updated character will still offer this button, then called Refresh, to re-download the model. This allows to restore the initial state of the avatar if it should bring errors."]]
Updates are not mandatory but are mainly recommended.
![]()
It is possible to update all the avatars you own in one action, using the Update All button displayed in the group title.
Uninstall: This button allows you to remove the item from your computer. It does not remove access to the character, which will still be considered purchased. It will then resume its "owned" state described above.
Availables for purchase
This list contains avatars that can be purchased with VTS credits. Clicking on these sets will open a window with more details.
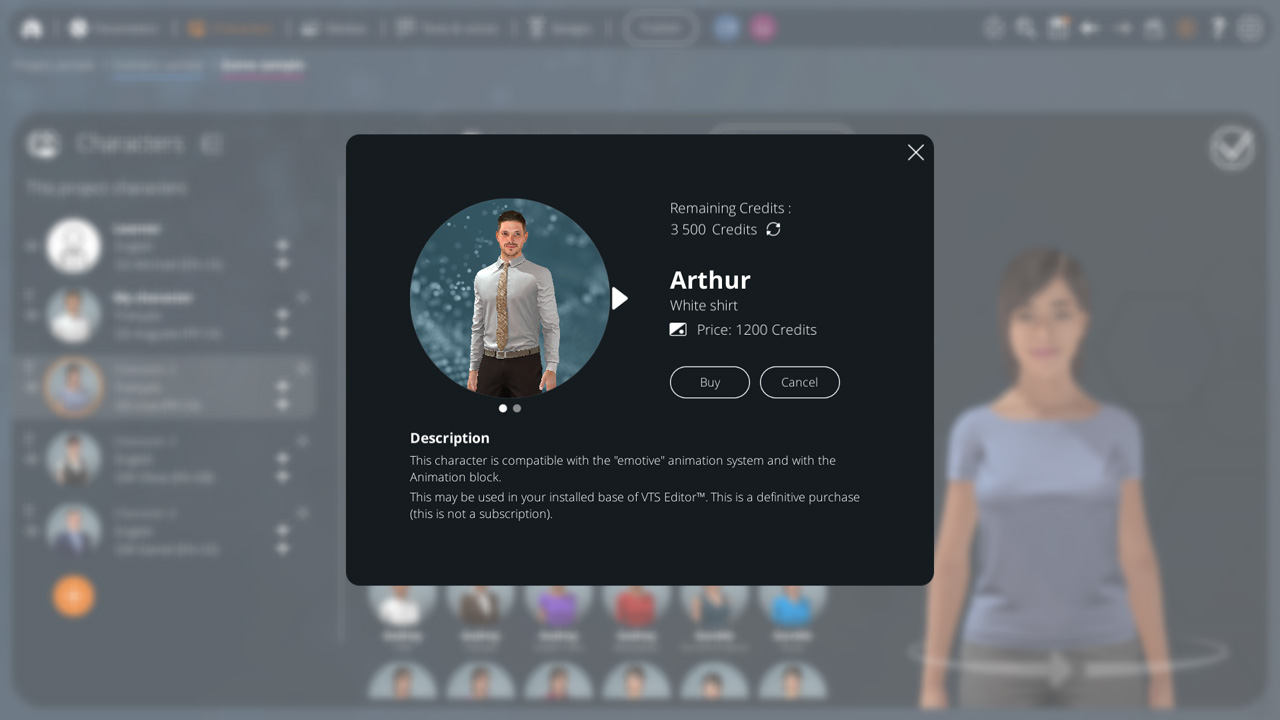
In this window, are displayed :
- Your current VTS credits count
- The avatar's name
- Its cost in VTS credits
- One or more preview images. They can be clicked to be displayed in fullscreen.
- A more detailed description of the avatar.
Some avatars are not compatible with the Animation Block and the new "emotive" animations. This info is available in their desciption.
The "Buy" button will ask your password to confirm your purchase. Once confirmed, your credits will be debited, your avatar automatically downloaded and moved to the group Availables characters.
Stopping a download will not cancel the purchase. The item will still be considered as owned and moved to the group Availables characters.
Filters
It is possible to filter the view using the search field, or the filters available below. If a filter is active, a "Clear All" button appears on the right to allow you to reset the view with one click.
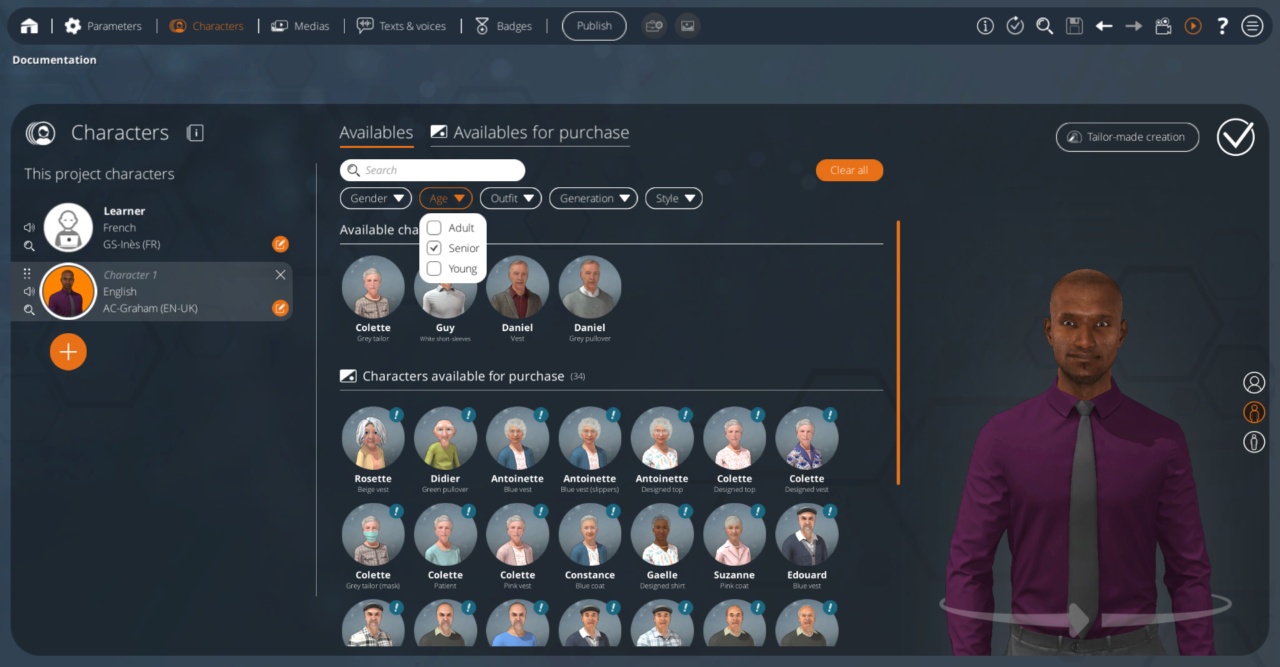
Preview
On the right side is a real-time preview of the selected character. You can drag the character on the left or on the right to rotate him.
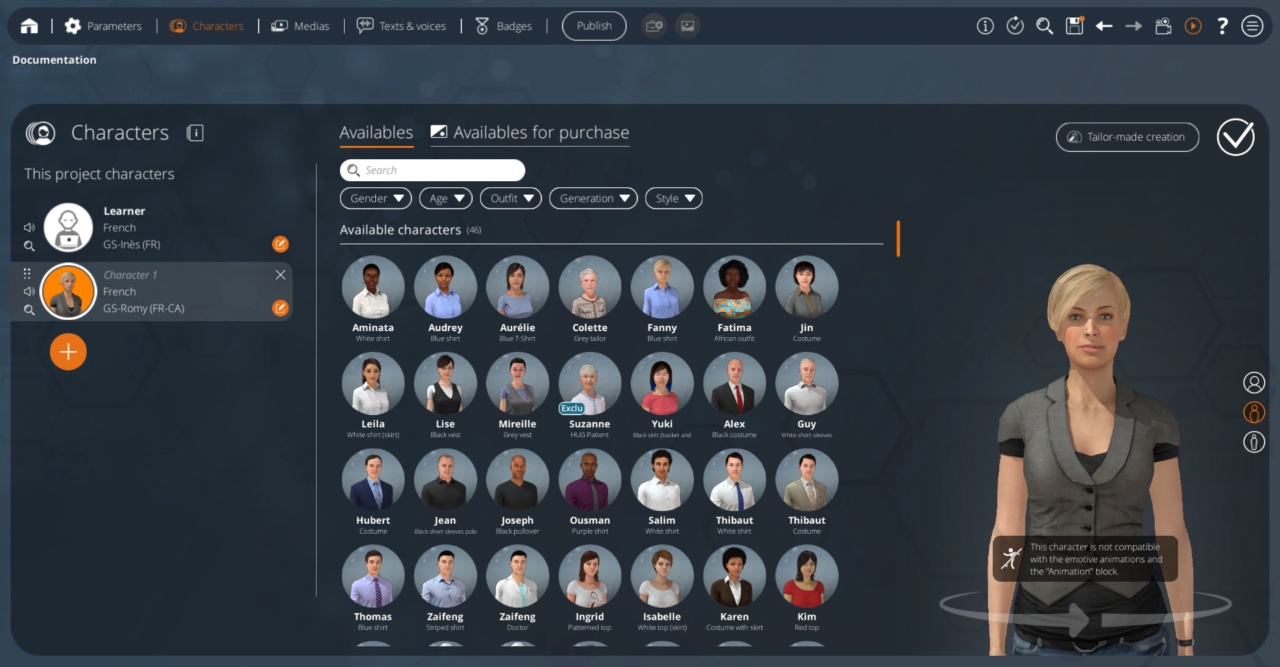
Characters are separated in two groups. Those who are compatible with the Animation Block and the new "emotive" animations, and those who aren't.
- ${ child.title }